

Interior construction High-end projects always demand the most stringent standards, and Techniques for installing herringbone pattern natural wood flooring in villas. This is one of the elements that best demonstrates the class of the space as well as the skill of the craftsman. Unlike the usual staggered tiling pattern, herringbone (or chevron) tiling offers a classic, luxurious beauty, creating a visual effect of expanding the space, and is extremely suitable for large living rooms and bedrooms in villas.
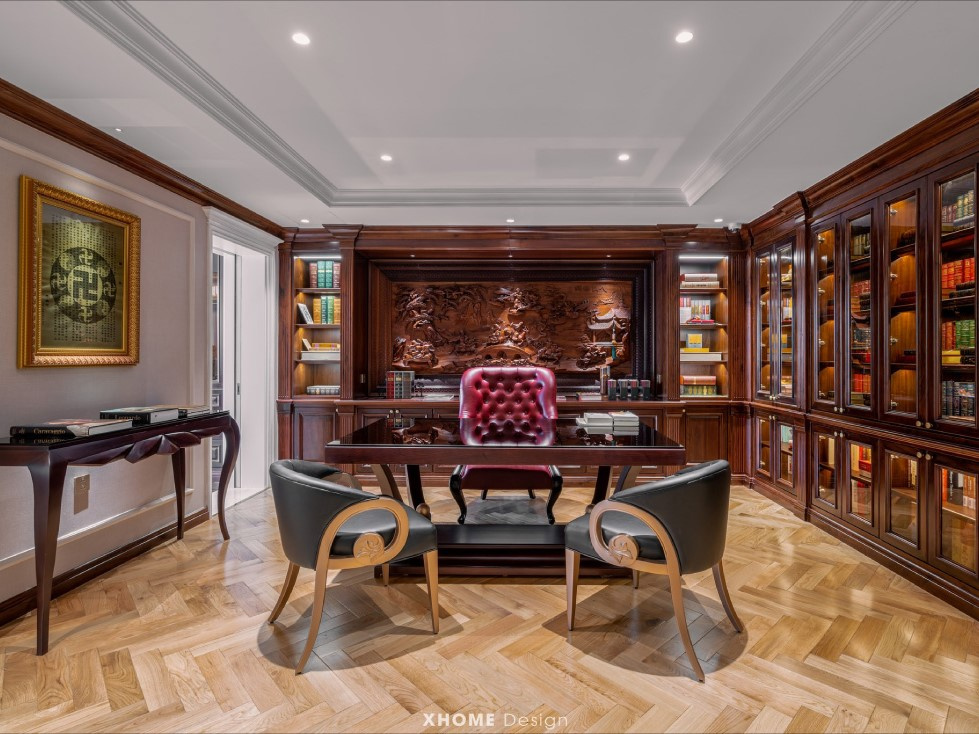
The distinctive features of herringbone natural wood flooring in villa spaces.
Herringbone natural wood flooring is a highlight that elevates the class and luxury of a villa's interior. However, the complex geometric structure of this laying style requires skilled professionals. interior design and construction experience Precisely designed to ensure maximum durability and aesthetic appeal. Let's take a look at the most essential features below.
The difference between natural wood and engineered wood when laying in a herringbone pattern.
Many people often confuse or equate the herringbone flooring process between natural wood and engineered wood. However, from a professional perspective, these are two completely different categories. Engineered wood has high stability, is less affected by weather, and its interlocking system is usually pre-designed to fit together easily. Meanwhile, natural wood (such as Mahogany, Walnut, Oak, and Rosewood) is a "living" material. It has a porous cellular structure that continuously absorbs and releases moisture according to environmental conditions, leading to continuous shrinkage and expansion.
When applying a herringbone pattern to natural wood flooring, the wood planks are interwoven at a 90-degree angle (Herringbone) or a 45-degree angle (Chevron). This interweaving creates multi-directional forces as the wood expands. If the construction technique is not precise, and insufficient space for the wood to "breathe" is not calculated, the entire villa floor surface may blister, shift, or crack after just one rainy or humid season.
Strict aesthetic and technical requirements for the villa.
Villa spaces typically have very large floor areas, spanning multiple interconnected areas such as the living room, dining room, and lobby. This presents a huge challenge: even a small error (about 1-2mm) in the first rows of wood, when extended to the end of the room, can result in a deviation of several centimeters, completely disrupting the geometric structure of the floor.
Furthermore, villa owners always demand absolute aesthetic perfection. The finished floor surface must be perfectly smooth, the grout lines must be tight, and the wood grain must be harmoniously coordinated (selecting wood planks of similar color to fit together). For these reasons, the construction requires highly skilled carpenters and floor installers with extensive practical experience, and consumes significantly more time and materials than conventional methods.
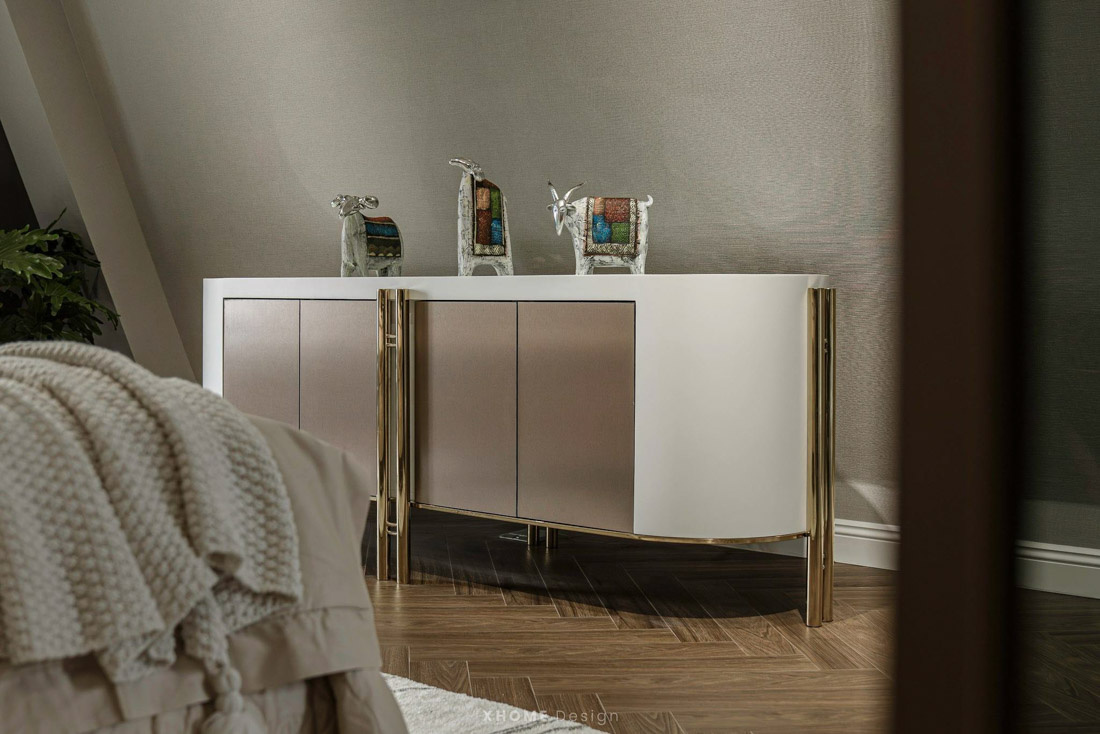
Prepare materials and prepare the subgrade before construction begins.
To ensure the longevity of natural wood flooring in a villa for decades, proper material preparation and subfloor treatment are crucial. A poor-quality subfloor will ruin all the efforts of the installer, no matter how expensive the wood used.
The ideal foundation level for a villa.
The subfloor (concrete surface, leveled cement, or old ceramic tile) must meet three core criteria: Flat – Hard – Dry. For villas, experts recommend that the flatness tolerance should not exceed 2mm per 2-meter radius. If the subfloor is uneven, when laying herringbone flooring, the interlocking joints will bend, causing an unpleasant creaking sound with movement.
Regarding moisture content, the concrete subfloor must be cured and allowed to dry completely (usually 28 days after laying). The ideal moisture content of the subfloor before construction should not exceed 12%. If the subfloor remains damp, moisture will rise and seep back into the underside of the natural wood flooring, causing warping and mold growth from within.
Choose the right foam padding and specialized adhesive.
Underlayment is a layer of material that separates the subfloor from the floorboards. For herringbone-patterned natural wood flooring in villas, thin, cheap white foam underlayment should absolutely not be used. Instead, contractors should use 2mm-3mm thick silver-coated foam underlayment or soft rubber. This underlayment not only provides absolute moisture resistance but also helps absorb sound, creating a soft, comfortable feel underfoot.
Furthermore, for the nail-and-glue installation method (most common for natural wood flooring), the choice of adhesive is crucial. It is recommended to use specialized latex glue or PU (Polyurethane) glue with high adhesion but still maintaining a certain degree of elasticity, allowing the floorboards to expand and contract slightly without breaking the bond.
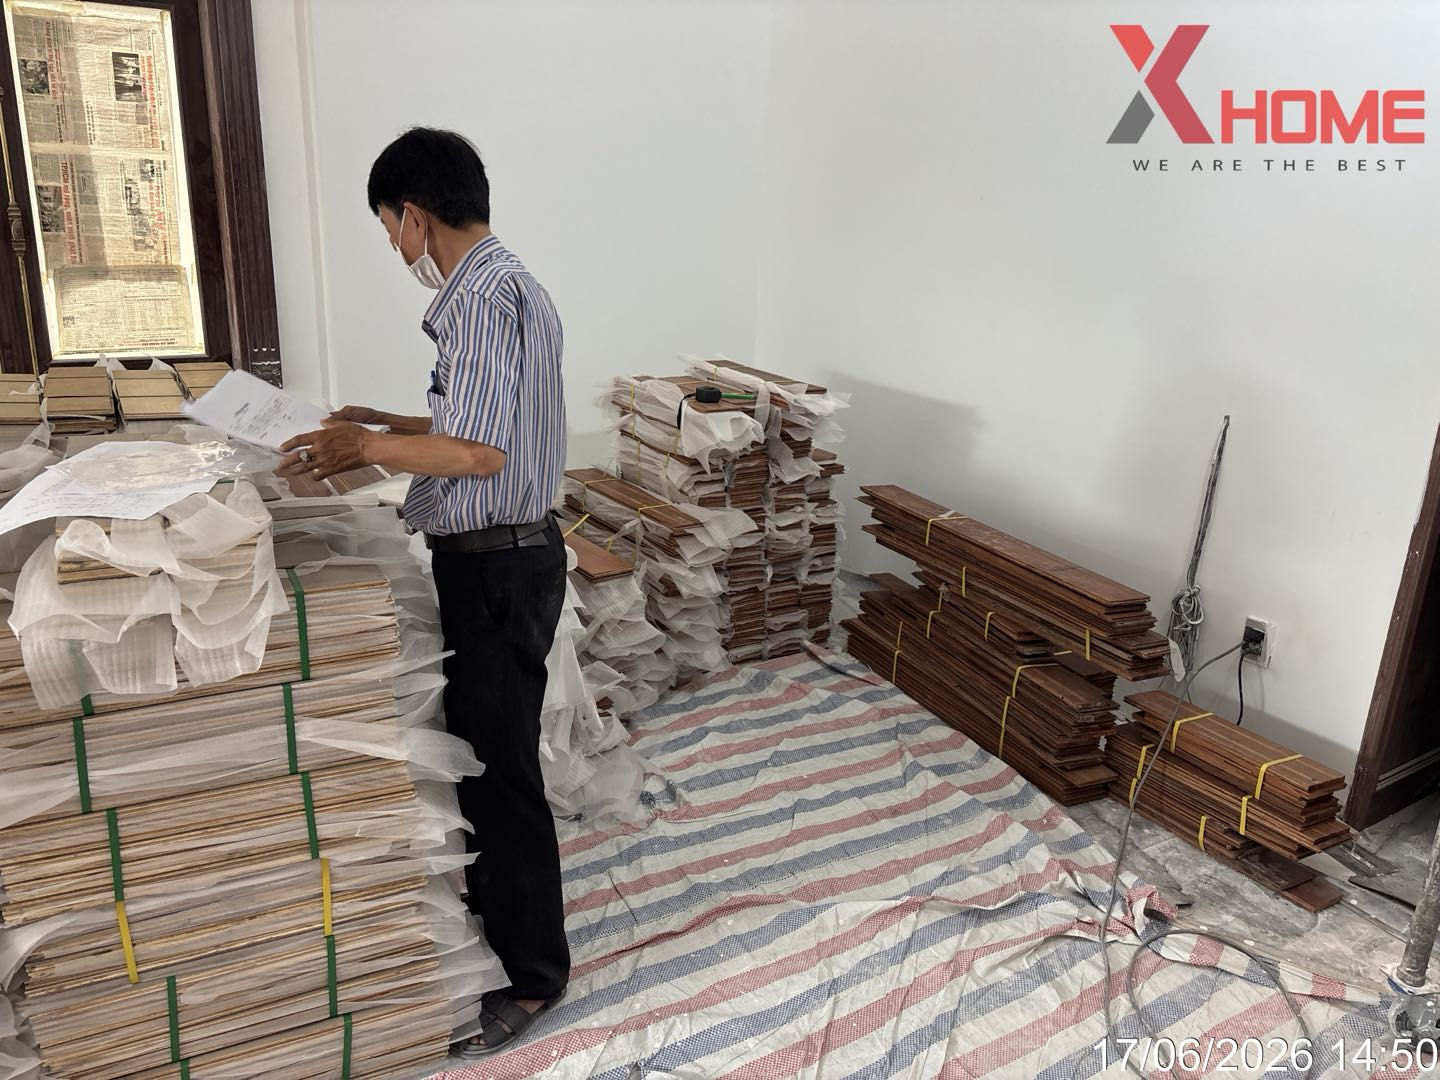
Treat the wood to remove moisture and allow it to adapt to the environment.
A crucial step, often overlooked by inexperienced contractors, is the acclimatization process – allowing the wood to adapt to the environment. Natural wood needs to be brought to the villa construction site at least 48 to 72 hours before installation. The wood boxes should be opened and staggered to allow air circulation. This process helps the moisture content of the wood balance with the actual temperature and humidity of the room, minimizing thermal shock and sudden shrinkage after installation.
Detailed technical process for installing herringbone pattern natural wood flooring.
The execution process requires meticulous attention to detail, high concentration, and strict adherence to geometric principles. Below is a step-by-step guide to the standard technical specifications for installing herringbone-patterned natural wood flooring in villas.
Step 1: Survey, measure, and divide the room's axis.
This is a crucial step that determines the aesthetics of the entire floor. Installers never begin laying tiles from a corner like with conventional flooring. Instead, they must find the center point of the room. Using a laser level and chalk, they will draw a baseline (main axis) running along the length of the room, usually the direction of the main light or the main entrance.
This central axis must divide the room in the most balanced way possible. Precisely dividing the axis ensures that the points of the herringbone pattern run straight, without being crooked, and also guarantees that the cut and joined wood pieces on both sides of the wall are of similar size, creating perfect symmetry for the villa's space.
Step 2: Install the first row of fishbones at the correct angle.
The first row of planks is considered the "backbone" of the entire floor system. The installers will select the straightest and most aesthetically pleasing planks (including A-planks – left-hand tongue and groove) to begin with. A positioning piece (usually a right-angled triangular plywood) will be temporarily fixed along the axis to serve as a support.
The first wooden plank is placed flush against the edge of the positioning plate, forming a 45-degree angle with the main axis. The second plank (opposite groove) is fitted onto the end of the first, creating a perfect V-shape (90-degree angle between the two planks). This process is repeated until the first herringbone strip running along the room's axis is completed. The carpenter must constantly use a ruler and laser level to check, ensuring that the herringbone strip is not bent or misaligned by even 1mm.
Step 3: Technique for applying glue and installing concealed nails
To cope with the surface tension and expansion/contraction of natural wood, the technique for installing herringbone-patterned natural wood flooring in villas requires the combination of both glue and nails. At the tongue and groove joints, the installer will apply a thin, even layer of wood glue. Too much glue should be used to prevent it from overflowing onto the floor surface during installation, but too little should also be used to maintain the bond.
After securely fastening the tongue and groove joints with a rubber mallet and floor trim, the worker will use a nail gun (T-shaped nails or pins) to drive nails into the tongue and groove joints of the wood planks. The standard nailing angle is 45 degrees, and the force applied is just enough to firmly secure the nail to the subfloor (or plywood underlay) without damaging the edges of the joints. The combination of glue and hidden nails creates a sturdy frame, locking the wood planks together while still allowing for synchronized expansion and contraction.
Step 4: Seal expansion joints and install finishing moldings.
When laying subsequent rows extending to both sides of the walls, installers must pay special attention to expansion joints. For natural wood flooring in large spaces such as villas, the required gap between the edge of the wood flooring and the baseboard (or fixed obstacles such as columns or stair treads) is 12mm to 15mm. Under no circumstances should the wood flooring be laid flush against the wall.
This gap is a necessary buffer space for the wood to "breathe" (expand) during the summer or humid seasons. After the entire floor is laid, this gap will be completely concealed by skirting board or end trim. Skirting boards are usually nailed directly to the wall, not nailed down to the wood floor, so that the floor can slide freely underneath.
Tips to reduce material loss during herringbone floor construction.
One of the biggest pain points for investors and contractors when installing herringbone-patterned natural wood flooring is the significantly increased material costs due to high material waste. Unlike straight-laying (with a waste rate of only about 3-5%), the herringbone pattern requires extensive beveling at the wall joints.
The standard waste rate when laying herringbone pattern flooring in a villa usually ranges from 10% to 15%, depending on the room shape (square rooms will have less waste than rooms with many corners and pillars). To calculate the exact amount of wood needed, you can apply the following formula: Actual floor area x 1.15 = Quantity of wood needed to order (in m2)Ordering extra from the start helps ensure that the wood planks are from the same production batch, with uniform color and grain.
To minimize waste, skilled craftsmen have their own secrets. First, they always carefully calculate the axis layout on paper before cutting the wood. Second, any excess wood cut at an angle in the left corner (if it's long enough) is sorted, marked, and reused to fit into the right corner or under staircases and cabinets. This diagonal utilization requires good spatial thinking and meticulousness from the craftsman, significantly saving expensive wood for the homeowner.
Common problems and solutions when installing natural wood flooring.
Even with a thorough understanding of the techniques for installing herringbone-patterned natural wood flooring in villas, mistakes can still occur in practice if there is a lack of close supervision. Below are some common errors and how to fix them:
- The floor is bulging and bumping up: This is the most serious error, 100% caused by the installer not leaving enough expansion joints at the base of the wall, or the room being too large (exceeding 10m in length) without using expansion joints. The only solution is to remove the baseboard molding, use a vibrating saw to trim the edges of the wood against the wall to create a 15mm gap, and then tap the floor to make it settle.
- The lock is loose and making a clicking sound. The cause is due to an uneven subfloor, or insufficient sealant application, or missing nails. When stepped on, the wooden planks sink in, causing friction at the interlocking joints and creating a creaking sound. To fix minor issues, specialized sealant can be injected into the gaps. If the problem is serious and caused by the subfloor, it will be necessary to remove that section of flooring, level the subfloor, and re-lay the planks.
- Fishbone misalignment: This error detracts from the overall aesthetics, as the diagonal lines are not aligned. This is caused by incorrect initial alignment or the installer not regularly checking the laser during tiling. This error cannot be fixed locally; the entire misaligned section must be dismantled and redone from scratch.
Expert advice: Installing herringbone natural wood flooring is an art that demands absolute precision. Villa owners should not skimp on labor costs but should choose reputable contractors. villa interior construction Reputable contractors with a team of professional craftsmen who have a deep understanding of the characteristics of each type of wood are essential. Before signing a contract, require the contractor to clearly commit to the waste rate, sub-base standards, and warranty against warping.
Hopefully, this in-depth analysis of Techniques for installing herringbone pattern natural wood flooring in villas. With this, architects, contractors, and homeowners have gained a comprehensive understanding and grasp of the most accurate process. A perfectly constructed herringbone floor not only provides lasting value but also serves as a highlight, enhancing the elegance and luxury of the living space.
- Email: info@xhomesg.com.vn
- Floor 12.B1 – REE Tower, 9 Doan Van Bo Street – Xom Chieu Ward – Ho Chi Minh City
- Hotline: 0899199786


